Customizing your IPTV playlist can significantly enhance your viewing experience, allowing you to quickly access your favorite channels. Whether you want to add new channels, remove those you don’t watch, or rearrange your list, editing your IPTV playlist is straightforward. Here’s a friendly, step-by-step guide to help you customize your Smart IPTV!
Step 1: Access Your IPTV App
1. Open Your Smart IPTV App: Start by launching the IPTV app on your smart TV. The app might have a specific name based on your provider (e.g., Smart IPTV, IPTV Smarters, etc.).
Step 2: Locate the Playlist Settings
1. Go to Settings: Once the app is open, navigate to the settings menu. This is usually represented by a gear icon or found in the menu.
2. Find Playlist Management: Look for an option that refers to playlists, such as “Playlist,” “Manage Playlist,” or “Settings.”
Step 3: Add a New Playlist
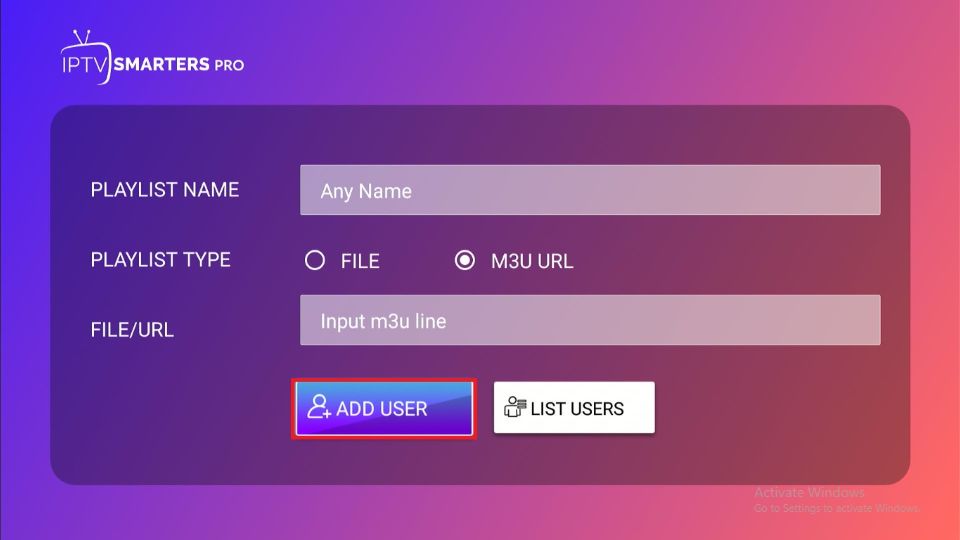
1. Choose to Add a Playlist: If you want to add a new IPTV playlist, select the option to add a new playlist.
2. Enter Playlist URL: You will need the M3U or M3U8 URL provided by your IPTV service. Paste the URL into the designated field.
3. Name Your Playlist: Give your playlist a memorable name for easy identification.
4. Save Changes: Make sure to save any changes you make.
Step 4: Edit Existing Channels
1. Access the Channel List: If you want to modify an existing playlist, find the option to view or manage your current channels.
2. Rearranging Channels: Most apps allow you to drag and drop channels to rearrange them. Click and hold the channel, then move it to your preferred spot.
3. Remove Unwanted Channels: To delete channels you no longer want, look for a delete or trash icon next to the channel name. Confirm the deletion when prompted.
Step 5: Add or Remove Favorites
1. Mark Favorites: Many IPTV apps let you mark channels as favorites. Find the channel you love and look for a star or heart icon to add it to your favorites list for easier access.
2. Manage Favorite Channels: You can also manage your favorite channels separately by removing any that you no longer watch.
Step 6: Save and Refresh Your Playlist
1. Save Your Edits: Once you’ve made all your changes, make sure to save your edits. There might be a button labeled “Save” or “Apply Changes.”
2. Refresh the Playlist: Some apps may require you to refresh the playlist to see the changes. Look for an option like “Refresh” or “Reload” within the playlist settings.
Step 7: Test Your Customized Playlist
1. Check Your Channels: After saving and refreshing, browse through your playlist to ensure all changes have been applied correctly.
2. Enjoy Watching: Now that your playlist is tailored to your preferences, sit back, relax, and enjoy your favorite shows and channels!
Tips for Effective Playlist Management
Regular Updates: Keep your playlist updated by removing channels you no longer watch and adding new ones you discover.
Back-Up Your Playlist: If your IPTV app allows you to export your playlist, consider doing so regularly. This way, you can easily restore it if needed.
Explore Online Resources: Some websites and forums share free or premium IPTV playlists. Just ensure they are legitimate and safe to use.
Conclusion.
Editing your IPTV playlist offers a quick and efficient way to personalize your TV viewing.
By following the provided steps, you can easily add new channels, rearrange them, and remove any you don’t watch.
Regular updates and playlist backups can further enhance your experience, keeping your channel list up-to-date and secure.
With your customized playlist, you can enjoy a smoother, more tailored selection of shows and channels that cater to your preferences.

