
Few things are more frustrating than scheduling your favorite live broadcast, only to discover a blank file or an error notification waiting for you. If you are experiencing La grabación de TiviMate no funciona on your Firestick, Shield TV, or Android TV box in the United States, you are not alone.
Fortunately, failed captures rarely mean the app is broken. In most cases, simple misconfigurations like storage permissions, single-connection provider limits, or network interruptions are the culprits.
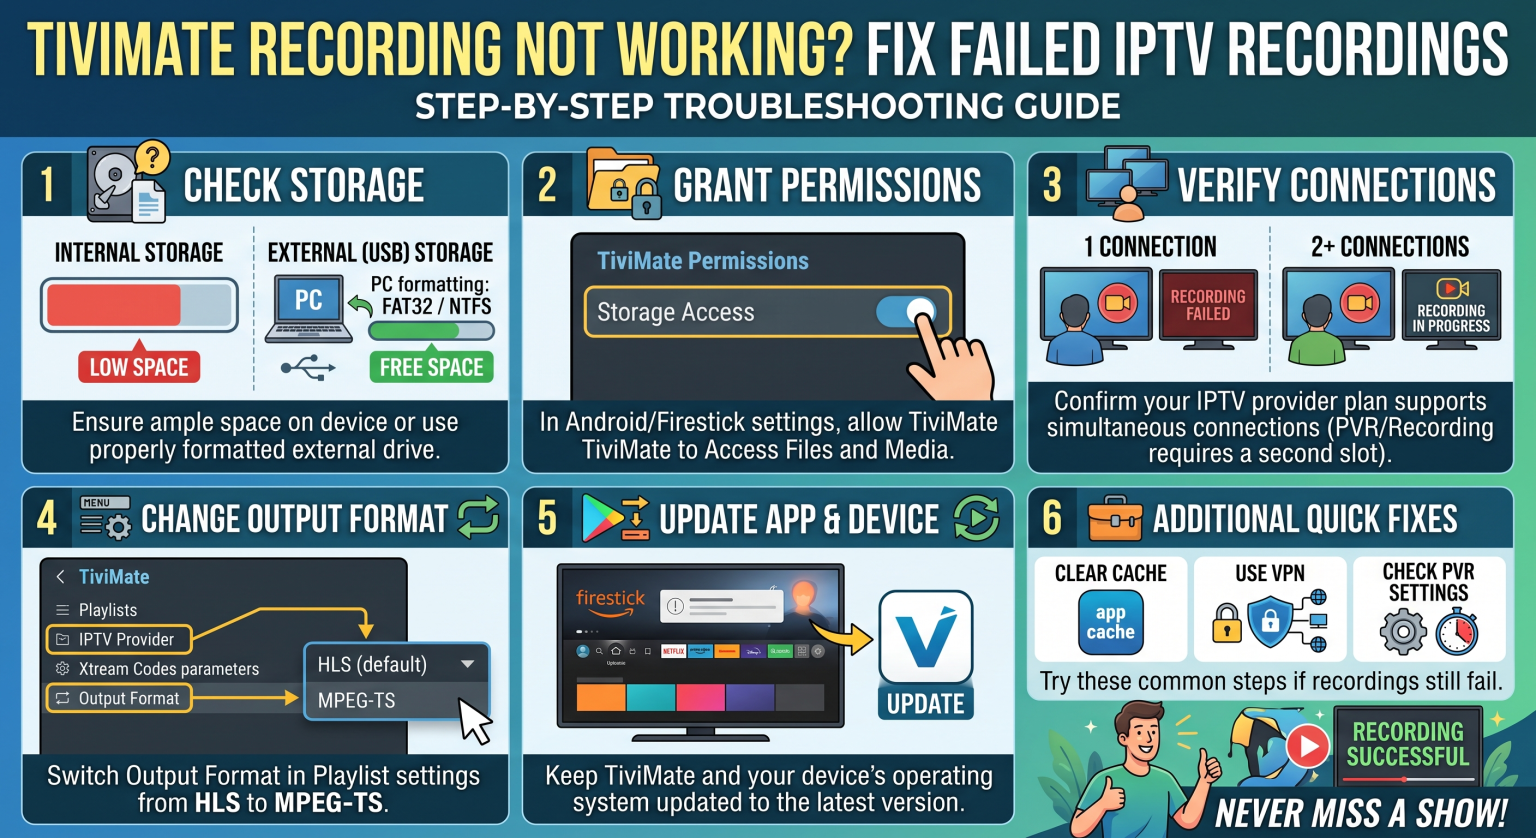
¿Por qué no funciona la grabación de tu TiviMate?
TiviMate is arguably the cleanest IPTV player available, but its recording engine requires continuous data throughput and direct write access. When a stream drops for even a fraction of a second, the recorder can choke and cancel the task.
Here are the most common root causes behind failed recordings:
-
Single-Connection Caps: Your IPTV service only allows one active connection, meaning watching one channel while recording another instantly kills the stream.
-
Android Storage Permissions: Android 11+ “Scoped Storage” restrictions often block TiviMate from saving files directly to local drives.
-
FAT32 File Size Limitations: USB drives formatted in FAT32 crash whenever a recording file reaches 4GB (roughly 60 to 90 minutes of HD video).
-
Device Sleep Timers: Fire TV and Chromecast devices often enter deep sleep mode during scheduled off-peak recordings, terminating background tasks.
5 Proven Solutions to Fix Failed IPTV Recordings
Follow these targeted troubleshooting steps to restore reliable recording functionality to your setup.
1. Upgrade to a Multi-Connection IPTV Plan
TiviMate treats recording as an active stream. If you record a live sports match while channel surfing, your provider registers two concurrent connections.
If your provider account is limited to a single stream, the server will automatically terminate one of the requests. Contact your provider to verify your stream tier or purchase a multi-screen package.
2. Configure a Dedicated SMB / LAN Network Share
Writing large video files to cheap USB drives or constrained internal flash storage frequently triggers write-speed errors.
Setting up a Shared Folder (SMB) on a Windows PC, Mac, or NAS drive allows your streaming device to offload video data over your local Wi-Fi or Ethernet network without filling device storage.
TiviMate Settings > Other > Recording > Recording folder > Select folder > Add SMB...
3. Grant “Allow All the Time” Storage Permissions
On Android TV 11, Google TV, and newer Fire OS builds, default permissions prevent background file writes.
-
Navigate to your device Settings > Apps > See All Apps > TiviMate.
-
Seleccionar Permissions > Files and Media.
-
Switch the permission from “Allow only while using the app” to Allow all the time.
4. Switch from FAT32 to exFAT or NTFS
If your recording stops abruptly after roughly 45 to 80 minutes, you are hitting the strict 4GB FAT32 file boundary.
Format your external flash drive or external SSD to exFAT o NTFS using a computer before connecting it to your streaming device. This removes maximum file limits completely.
5. Disable Aggressive Energy Savers
Ensure your streaming stick does not power down during scheduled late-night events. Navigate to your device’s display and power preferences and disable automatic sleep timers or ambient standby modes.
TiviMate Recording Storage Options Compared
Choosing the right storage destination is the single most important factor for reliable playback and scheduled captures. Review the comparison below to pick the best setup for your home network:
| Storage Type | Primary Advantage | Major Limitation | Ideal para |
| Internal Flash Storage | Zero setup required; instant plug-and-play | Limited space (often under 5GB free); risks app bloat | Short clips under 30 minutes |
| External USB / SSD (OTG) | High capacity; portable; low cost | Requires OTG adapter cables; FAT32 formatting hurdles | Firestick & standalone streaming boxes |
| SMB / NAS Network Share | Virtually unlimited space; accessible across all devices | Requires local network configuration; dependent on LAN stability | Power users & multi-room households |
Why TiviMate Recording Fails for US Streamers (And How to Prevent It)
Streamers in the US frequently face ISP-level throttling during peak evening primetime hours. Major American internet service providers like Comcast Xfinity, Spectrum, and Cox routinely monitor high-bandwidth continuous UDP streaming protocols.
When your ISP detects extended IPTV traffic during a scheduled recording, they may throttle your bandwidth momentarily. A momentary speed drop of two seconds is enough to cause TiviMate to encounter a stream timeout error and abort the save file.
Using a verified streaming VPN with fast WireGuard servers keeps your connection encrypted, prevents regional ISP packet inspection, and maintains the steady bitrate required for flawless recordings.
Conclution
Tired of missing critical games and season finales due to dropped streams, server blocks, and ISP speed limits? Upgrade your streaming freedom with our high-speed, multi-connection premium streaming packages today enjoy zero amortiguación, full EPG guides, and uninterrupted recording on all your favorite devices!
Preguntas frecuentes
Can I record on TiviMate with the free version?
No. Scheduled recording and custom recording directories are premium features. You must unlock TiviMate Premium via the companion app or Google Play Store to enable recording.
Why does my TiviMate recording stop after a few minutes?
This is typically caused by IPTV server buffering, single-connection account limits, or aggressive background process killers on low-RAM streaming sticks. Enabling a larger stream buffer in TiviMate playback settings can help mitigate minor packet drops.
Does TiviMate record when my TV screen is turned off?
Yes, as long as the streaming box itself remains powered on. Ensure your device is plugged into a wall outlet rather than your TV’s USB port, which loses power when the TV powers down.